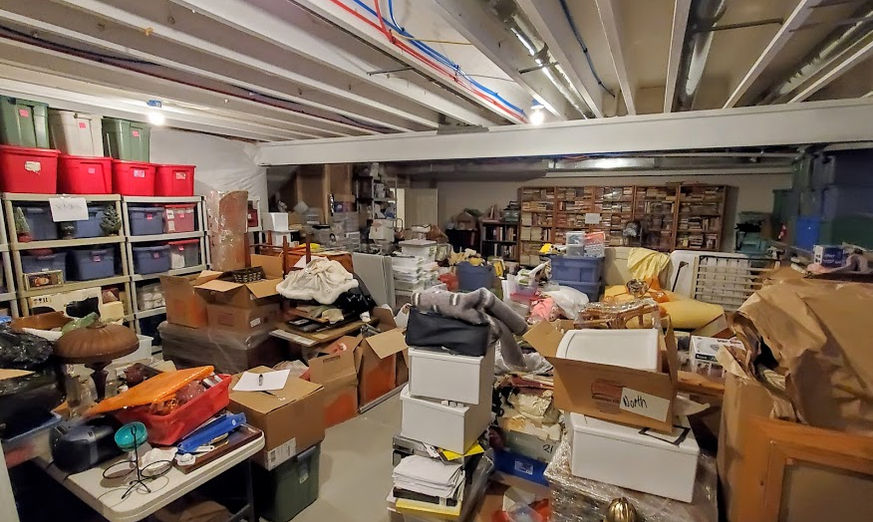
Basement Storage Transformation
When we first received an inquiry from this client, we did a virtual consult but it really was necessary to go to the client’s home to walk through the enormous storage space in the basement and discuss the client’s vision that required moving a lot of the “stuff” from the basement to one of two garages as well as a few other places in the house.
But the vast majority was remaining in the basement.
And even though a lot of stuff was already in bins, there was still SOOOOOOOOO much more that had gotten lost in that space since they moved there a few years earlier plus they inherited a lot more after 3 relatives passed away in a relatively short period of time.
We managed to clear almost everything from the floor and set up a few key sections by the end of Day 1 including an area for scrapbooking and craft projects so the client was able to start doing both activities more since she had recently retired.
Day 2 was spent sorting through many of the bins and boxes that hadn’t been touched in years and continuing to shift where things were so they were in the right section
And by the end of Day 3 we created several more sections utilizing shelving as section dividers and every bin and box was appropriately labeled.
In total, this project took 3 full 8 hour days with 4 members of #TeamIJS working nonstop. The client never imagined we would be able to complete this part of her vision before having knee surgery but, you know what, WE...NAILED...IT!
Then again, we always do. Yes, we will brag because, well, why not?
Biggest tips and takeaways?
-
Write down your goals for the space as well as draw a very basic floor plan and mark where you believe things will go. Try to think in terms of categories. This client had a lot of books as you can tell from the photos below and there were several bins that were also filled with books that were tucked away in the corner next to the wall of bookshelves. The first thing we did when we got there on Day 1 was put signs around the room to make sure we all knew where things would eventually land once we started going through everything not already on shelves.
-
Make sure you identify the "low hanging fruit" as early on as possible...the stuff you can easily see and know you are not keeping or moving to another location and stage it, if possible, outside of the work area. We actually tried to utilized the finished part of the basement outside of the large storage area primarily for things that were going to end up back in there because one member of our team literally played the role of the "schlepper" the entire day and as soon as we identified anything that was not going to remain in that space he immediately took it up to one of the garages.
-
Have some bins, baskets, boxes and/or bags for sorting like items. It really does help even if you have significantly less you are trying to organize. If you don't have any then see if you can find some for free by asking on Nextdoor. There are always people with boxes they are giving away after a move so just ask. Or ask your local liquor store for some.
-
LABEL EVERYTHING!!! Even if your bins or containers are clear or see through enough take the extra step to put whatever label you prefer on every bin/box. You don't need a label maker unless you like that uniform look. Some clients are perfectly content with using duct tape and a Sharpie, but if you are more about the aesthetics there are lots of premade labels you can buy online these days. Or if you fall somewhere in the middle of the labeling spectrum, you can buy a package of label stickers and either utilize Avery Labels online templates for printing individual ones or just hand write the description.
-
Make sure to arrange for an extra garbage pickup if you think you will be generating a lot of trash. Or check out Waste Management #bagster program. The giant bags are available at places like The Home Depot, Bed Bath & Beyond or Amazon or directly from Waste Management. Once the bag is full, schedule the pick up and you are done!


